Install TNG on a Synology NAS
Posted: Mon Oct 16, 2017 1:21 am
Requirements:
Synology Disk Station running DSM 6.0 or above (Manual permission instructions are included for older versions)
TNG (The Next Generation of Genealogy Sitebuilding) Version 11.0 or above.
Before installing TNG, a DYNAMIC website with a unique folder name must be created for TNG. Instructions to set up and configure the website can be found here: Create a Web Site
The instructions contain a HTML example page that can be placed in the TNG folder, temporarily, to verify connecting to the NAS using your domain name over the internet.
1 - Synology Packages Required
Web Station
phpMyAdmin (Note phpMyAdmin will automatically install MariaDB)
After installing both packages start MariaDB.
When MariaDB starts you must create a password.
The MariaDB password is the same password you will use for phpMyAdmin.
Setup a MariaDB database
Login to phpMyAdmin using the username root and your MariaDB password.
When phpMyAdmin starts you will see a screen like the one below.
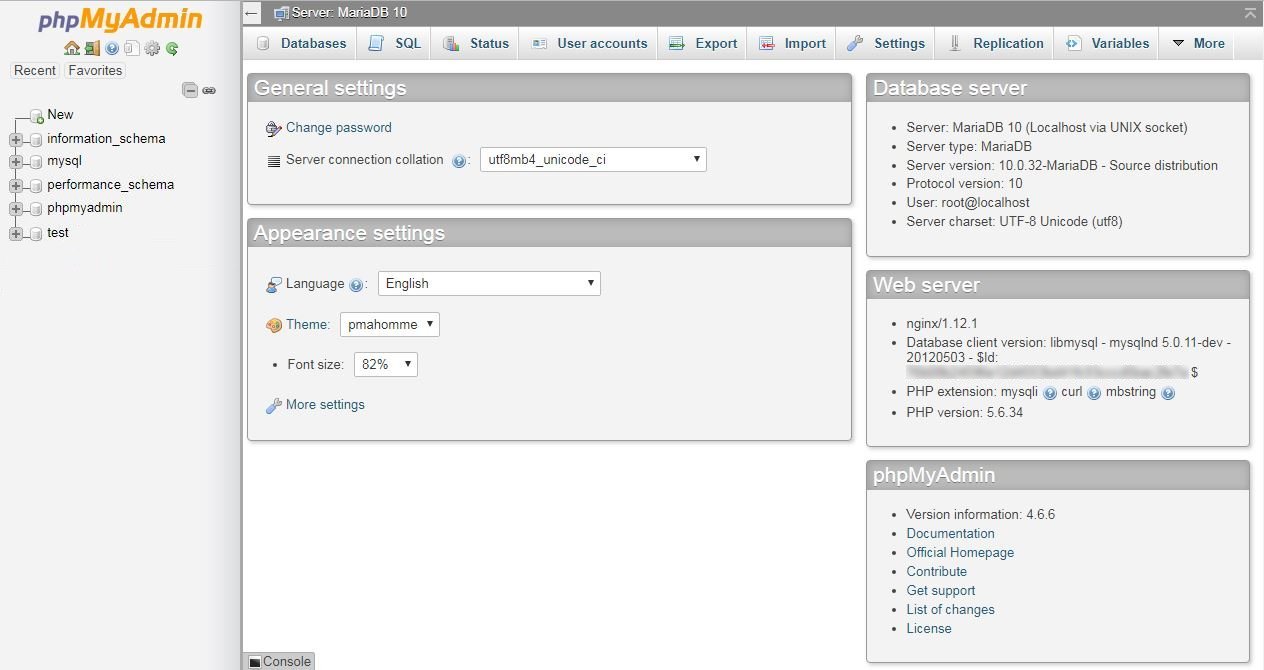
Select the User Account tab and the following screen appears. Then select the Add User Account option shown at the red arrow below.

On the user account page enter the user name, host name and password.
The user name is the name you want to give TNG to access the database.
In his example the database name will be the same as the username.
TNG uses a user name and a password to access the database.

For the Host Name select local from the pull down menu.
Enter a password you want to use for your database and re-type to confirm. You can use special characters but avoid using the following characters: ampersand, single quotes, double quotes or slashes.
This is the password TNG will use to access the database. It IS NOT the MariaDB password. You can select Generate to have phpMyAdmin create a password as well. Make sure you copy and paste or write down the password somewhere safe. You will need it to connect TNG to the database.
Check the box Create database with same name and grant all privileges.

You do not need to grant the TNG user global privileges however privileges can always be changed later if you want this user to access another database.
If you want to use SSL enable it on your Disk Station. Enabling SSL on the database may prevent TNG from connecting to the database correctly.
When finished select the Go button at the lower right of the screen.
To check the new user has the correct privileges, select the home button in phpMyAdmin and select the User accounts tab.
Locate the new user you just created and select edit privileges.
The line at the top should look something like:
User account 'tngusername'@'localhost' - Database tngdatabasename
Select the database button and select edit privileges again.

All boxes should be checked except the grant box, under administration. It is not necessary for TNG. It enables this user to add users and privileges without reloading the privilege tables.
Remember to select the go button if you make any changes so they are accepted.
The empty database is created and ready so Close phpMyAdmin.
2 - Extract the TNG files to your Synology DSM
Login to DSM and open File Station. Navigate to the new TNG folder for the website. Delete all files created for testing the internet connection, during the website setup . Then upload or copy the TNG zip file to the TNG folder. Alternately, you can enable SMB settings and MAP NAS drives directly to a MAC or PC. Using this protocol you can copy the files directly across the LAN. If you have a remote application, enable FPT or SFPT to upload files to the NAS.

Right click the TNG zip file and select > Extract > Extract Here

DSM will extract all files to the TNG folder with 555 permissions, for the internet, inherited from the web folder.

3 - Changing File Permissions
A Synology NAS runs Linux but file permissions are unique due to the DSM ACL configuration. TNG or an FTP program cannot change permissions on a Synology NAS. However, TNG file permissions can be changed using DSM File Station (more info can be found in the Synology Knowledge Base) or manually using SSH and a terminal emulator.
The web folder permissions are 644 for http connections and 755 for DSM administrators when Web Station is installed. Programs installed in the web folder inherit these settings which may not work when using a dynamic PHP program like TNG.
To set global permissions on the TNG folder, open file station, navigate to and select the TNG folder then right click on properties.

When the property window opens, select Permission.

The window displays the permission settings which are greyed out because they are inherited from the web folder.

Select Advanced options then click Make inherited permissions explicit

Once permissions become explicit, they can be edited. Synology displays two different icons for http (internet clients).
A single person icon represents a user which, in this case, is an http user. The icon with two persons represents a group which, in the cases below, are the http and administrators groups.
Select the http user and select edit.

Then check the Write checkbox and click the Done button.

DO NOT forget to check the Apply to this folder, sub-folders and files checkbox. This is required to change the TNG folder and file permissions. Then select the save button.

Experienced users, familiar with terminal emulation software and using SSH, can set permissions manually.
I DO NOT RECOMMEND SETTING PERMISSIONS MANUALLY UNLESS YOU ARE FAMILIAR WITH USING SSH AND THE CHMOD COMMAND.
TNG recommends the settings below.
Use CHMOD commands to set the following permissions on these files:
chmod 666 adminlog.txt
chmod 666 config.php
chmod 666 genlog.txt
chmod 666 importconfig.php
chmod 666 logconfig.php
chmod 666 mapconfig.php
chmod 666 pedconfig.php
chmod 666 subroot.php
chmod 666 templateconfig.php
chmod 666 whatsnew.txt
Use CHMOD commands to set the following permissions on these folders:
chmod 755 photos
chmod 755 histories
chmod 755 documents
chmod 755 headstones
chmod 755 media
chmod 755 gedcom
chmod 755 gendex
chmod 755 backups
Due to the DSM permission configuration 755 may not work on these folders. If it does not work, a higher permission setting may be required.
To test your permissions return to the TNG readme file on your browser and select next twice to move to the folders page. Select the backup folder, change the name and select the rename button. If it renames the file your permissions change was successful.
You can change the name back or leave the new name and proceed with Finish the TNG installation.
4 - Finish the TNG installation
Your permissions are set, so use your web browser to return to the Readme instructions to complete your TNG installation. To start the TNG installation you must load your new web page in a browser. DO NOT use a Windows or MAC explorer type program and DO NOT use the Synology QuickConnect feature because it connects to DSM not your web pages. You MUST use a browser.
To run locally type your local server IP address followed by /readme.html or /tngfoldername/readme.html
So it looks something like 192.168.1.15/readme.html or 192.168.1.15/tngfoldername/readme.html
To run or check web access, start your browser and enter:
The TNG readme page should appear. If the page does not appear check the spelling and IP address.
If you used a web address try checking the virtual host port and make sure your firewall or router does not block access to the port.
When the TNG readme page appears select Express Installation as shown below.

Item 3 - DO NOT SELECT THE SET PERMISSIONS BUTTON because this will generate an error and the correct permissions were set earlier. (TNG cannot change file permissions on a Synology DSM.)
Item 4 - You may change the folder names per the TNG recomendations. If premissions were set correctly, the folders can be renamed. If you cannot rename the folders, review and carefully follow the steps in Changing File Permissions.
Item 5 - Select the default language and character set from the pull down menu.
Item 6 - The database connection settings are simple if you are using MariaDB version 5 or above.

Enter the DATABASE NAME you created for TNG.
Then enter the TNG database USER NAME and PASSWORD you created earlier.
Go to DSM and open the MariaDB version used for the TNG database.
Ensure the TCP/IP box is not checked, unless you need to enable remote access to the database. Checking this box allows direct access to the database from the internet. Someone guessing you user name and password can corrupt or even destroy the database.
IMPORTANT: If a DDNS host is used, such as Synology.me TCP/IP MUST BE ENABLED to allow remote access.
The Domain Socket can only be used when a Synology NAS is the primary host domain.

Select the MariaDB copy icon as shown at the arrow above and paste the value in the Database Socket window in TNG. It is more secure to use a database socket than the TCP/IP port. However, a database socket only works for local processes and does not support remote connections.

If you are using a DDNS host such as Synology.me, you cannot use the database socket because the database connection must use a TCP/IP connection. If this is the case, leave the database socket empty and enter the Database port number. The default port is 3306 but can be verified by logging to DSM and opening MariaDB. If the TCP/IP connection does not work, open DSM and check the firewall rules located in the Control Panel security section. Here you can add a rule to allow MaridaDB through the firewall.

Select the Save and Verify Button. If you entered the information correctly TNG will display a message about the TNG connection status. If TNG does not connect, check your spelling for typos, verify the information used to create your MariaDB database and the socket path are correct.
Now there are only 3 more steps so you are nearly finished.
Item 7 - The MariaDB default collation for new databases is typically utf8_general_ci. While this can be used, it is a legacy collation that does not support some foreign language characters. To support multiple languages the newer
Select the Save and Create tables button. TNG will create all the necessary tables in the MariaDB database with the collation entered. TNG will display a status message when table creation is complete.
Keep in mind, when adding other languages after TNG is installed, to use UTF8 languages which work best if the utf8mb3_unicode_520_ci collation is used.

Item 8 - Create a user name and password for your access to TNG. You can use special characters but avoid using the following characters: ampersand, single quotes, double quotes or slashes. This should be different from all the other user names and passwords you have created. The first user you create will be the administrator. In the email field, enter the TNG admin email you want to use for user contact and select the Create User button. TNG should display a success status message.
Item 9 - If you like, you can enter another ID and the name for your tree. (Do not use hyphens or special characters in the ID)
Select the Create Tree button. TNG should display a success status message.
When the installation is complete close and restart your web browser.
Enter
When the TNG install is complete go to the admin home page, select setup and then the diagnostics tab.
Scroll down and check the status of each line.
If any lines show a yellow or red warning, check the warning information to determine the corrective action.
If you entered the permissions correctly you should not see any warnings.

At this point you can enter people manually or import a GEDCOM.
Keep in mind if you import a very large GEDCOM it may take a while.
My GEDCOM is 80.86GB and it takes about twenty minutes to import.
TNG has a progress bar which works great in version 11.0.2 on the Synology DSM unless you are using SSL.
If you have questions about your TNG software contact TNG or check the TNG WIKI pages for help and information.
If you have technical questions about your Synology DSM contact Synology Tech Support or check the Synology Forums for help and additional information.
Synology Disk Station running DSM 6.0 or above (Manual permission instructions are included for older versions)
TNG (The Next Generation of Genealogy Sitebuilding) Version 11.0 or above.
Before installing TNG, a DYNAMIC website with a unique folder name must be created for TNG. Instructions to set up and configure the website can be found here: Create a Web Site
The instructions contain a HTML example page that can be placed in the TNG folder, temporarily, to verify connecting to the NAS using your domain name over the internet.
Contents Menu:
1 - Synology Packages Required
Web Station
phpMyAdmin (Note phpMyAdmin will automatically install MariaDB)
After installing both packages start MariaDB.
When MariaDB starts you must create a password.
The MariaDB password is the same password you will use for phpMyAdmin.
Setup a MariaDB database
Login to phpMyAdmin using the username root and your MariaDB password.
When phpMyAdmin starts you will see a screen like the one below.
Select the User Account tab and the following screen appears. Then select the Add User Account option shown at the red arrow below.
On the user account page enter the user name, host name and password.
The user name is the name you want to give TNG to access the database.
In his example the database name will be the same as the username.
TNG uses a user name and a password to access the database.
For the Host Name select local from the pull down menu.
Enter a password you want to use for your database and re-type to confirm. You can use special characters but avoid using the following characters: ampersand, single quotes, double quotes or slashes.
This is the password TNG will use to access the database. It IS NOT the MariaDB password. You can select Generate to have phpMyAdmin create a password as well. Make sure you copy and paste or write down the password somewhere safe. You will need it to connect TNG to the database.
Check the box Create database with same name and grant all privileges.
You do not need to grant the TNG user global privileges however privileges can always be changed later if you want this user to access another database.
If you want to use SSL enable it on your Disk Station. Enabling SSL on the database may prevent TNG from connecting to the database correctly.
When finished select the Go button at the lower right of the screen.
To check the new user has the correct privileges, select the home button in phpMyAdmin and select the User accounts tab.
Locate the new user you just created and select edit privileges.
The line at the top should look something like:
User account 'tngusername'@'localhost' - Database tngdatabasename
Select the database button and select edit privileges again.
All boxes should be checked except the grant box, under administration. It is not necessary for TNG. It enables this user to add users and privileges without reloading the privilege tables.
Remember to select the go button if you make any changes so they are accepted.
The empty database is created and ready so Close phpMyAdmin.
2 - Extract the TNG files to your Synology DSM
Login to DSM and open File Station. Navigate to the new TNG folder for the website. Delete all files created for testing the internet connection, during the website setup . Then upload or copy the TNG zip file to the TNG folder. Alternately, you can enable SMB settings and MAP NAS drives directly to a MAC or PC. Using this protocol you can copy the files directly across the LAN. If you have a remote application, enable FPT or SFPT to upload files to the NAS.
Right click the TNG zip file and select > Extract > Extract Here
DSM will extract all files to the TNG folder with 555 permissions, for the internet, inherited from the web folder.
3 - Changing File Permissions
A Synology NAS runs Linux but file permissions are unique due to the DSM ACL configuration. TNG or an FTP program cannot change permissions on a Synology NAS. However, TNG file permissions can be changed using DSM File Station (more info can be found in the Synology Knowledge Base) or manually using SSH and a terminal emulator.
The web folder permissions are 644 for http connections and 755 for DSM administrators when Web Station is installed. Programs installed in the web folder inherit these settings which may not work when using a dynamic PHP program like TNG.
To set global permissions on the TNG folder, open file station, navigate to and select the TNG folder then right click on properties.
When the property window opens, select Permission.
The window displays the permission settings which are greyed out because they are inherited from the web folder.
Select Advanced options then click Make inherited permissions explicit
Once permissions become explicit, they can be edited. Synology displays two different icons for http (internet clients).
A single person icon represents a user which, in this case, is an http user.
Select the http user and select edit.
Then check the Write checkbox and click the Done button.
DO NOT forget to check the Apply to this folder, sub-folders and files checkbox. This is required to change the TNG folder and file permissions. Then select the save button.
Experienced users, familiar with terminal emulation software and using SSH, can set permissions manually.
I DO NOT RECOMMEND SETTING PERMISSIONS MANUALLY UNLESS YOU ARE FAMILIAR WITH USING SSH AND THE CHMOD COMMAND.
TNG recommends the settings below.
Use CHMOD commands to set the following permissions on these files:
chmod 666 adminlog.txt
chmod 666 config.php
chmod 666 genlog.txt
chmod 666 importconfig.php
chmod 666 logconfig.php
chmod 666 mapconfig.php
chmod 666 pedconfig.php
chmod 666 subroot.php
chmod 666 templateconfig.php
chmod 666 whatsnew.txt
Use CHMOD commands to set the following permissions on these folders:
chmod 755 photos
chmod 755 histories
chmod 755 documents
chmod 755 headstones
chmod 755 media
chmod 755 gedcom
chmod 755 gendex
chmod 755 backups
Due to the DSM permission configuration 755 may not work on these folders. If it does not work, a higher permission setting may be required.
To test your permissions return to the TNG readme file on your browser and select next twice to move to the folders page. Select the backup folder, change the name and select the rename button. If it renames the file your permissions change was successful.
You can change the name back or leave the new name and proceed with Finish the TNG installation.
4 - Finish the TNG installation
Your permissions are set, so use your web browser to return to the Readme instructions to complete your TNG installation. To start the TNG installation you must load your new web page in a browser. DO NOT use a Windows or MAC explorer type program and DO NOT use the Synology QuickConnect feature because it connects to DSM not your web pages. You MUST use a browser.
To run locally type your local server IP address followed by /readme.html or /tngfoldername/readme.html
So it looks something like 192.168.1.15/readme.html or 192.168.1.15/tngfoldername/readme.html
To run or check web access, start your browser and enter:
http://yourdomainname/readme.html orhttp://yourdomainname/tngfoldername/readme.html depending on how you setup your web access.The TNG readme page should appear. If the page does not appear check the spelling and IP address.
If you used a web address try checking the virtual host port and make sure your firewall or router does not block access to the port.
When the TNG readme page appears select Express Installation as shown below.
Item 3 - DO NOT SELECT THE SET PERMISSIONS BUTTON because this will generate an error and the correct permissions were set earlier. (TNG cannot change file permissions on a Synology DSM.)
Item 4 - You may change the folder names per the TNG recomendations. If premissions were set correctly, the folders can be renamed. If you cannot rename the folders, review and carefully follow the steps in Changing File Permissions.
Item 5 - Select the default language and character set from the pull down menu.
Item 6 - The database connection settings are simple if you are using MariaDB version 5 or above.
Enter the DATABASE NAME you created for TNG.
Then enter the TNG database USER NAME and PASSWORD you created earlier.
Go to DSM and open the MariaDB version used for the TNG database.
Ensure the TCP/IP box is not checked, unless you need to enable remote access to the database. Checking this box allows direct access to the database from the internet. Someone guessing you user name and password can corrupt or even destroy the database.
IMPORTANT: If a DDNS host is used, such as Synology.me TCP/IP MUST BE ENABLED to allow remote access.
The Domain Socket can only be used when a Synology NAS is the primary host domain.
Select the MariaDB copy icon as shown at the arrow above and paste the value in the Database Socket window in TNG. It is more secure to use a database socket than the TCP/IP port. However, a database socket only works for local processes and does not support remote connections.
If you are using a DDNS host such as Synology.me, you cannot use the database socket because the database connection must use a TCP/IP connection. If this is the case, leave the database socket empty and enter the Database port number. The default port is 3306 but can be verified by logging to DSM and opening MariaDB. If the TCP/IP connection does not work, open DSM and check the firewall rules located in the Control Panel security section. Here you can add a rule to allow MaridaDB through the firewall.
Select the Save and Verify Button. If you entered the information correctly TNG will display a message about the TNG connection status. If TNG does not connect, check your spelling for typos, verify the information used to create your MariaDB database and the socket path are correct.
Now there are only 3 more steps so you are nearly finished.
Item 7 - The MariaDB default collation for new databases is typically utf8_general_ci. While this can be used, it is a legacy collation that does not support some foreign language characters. To support multiple languages the newer
utf8mb3_unicode_520_ci database collation is preferred which supports all modern written languages. So you can still use the default utf8_general_ci setting for supporting English and a few other languages or utf8mb3_unicode_520_ci to support all modern written languages.Select the Save and Create tables button. TNG will create all the necessary tables in the MariaDB database with the collation entered. TNG will display a status message when table creation is complete.
Keep in mind, when adding other languages after TNG is installed, to use UTF8 languages which work best if the utf8mb3_unicode_520_ci collation is used.
Item 8 - Create a user name and password for your access to TNG. You can use special characters but avoid using the following characters: ampersand, single quotes, double quotes or slashes. This should be different from all the other user names and passwords you have created. The first user you create will be the administrator. In the email field, enter the TNG admin email you want to use for user contact and select the Create User button. TNG should display a success status message.
Item 9 - If you like, you can enter another ID and the name for your tree. (Do not use hyphens or special characters in the ID)
Select the Create Tree button. TNG should display a success status message.
When the installation is complete close and restart your web browser.
Enter
http://www.yourdomainname or http://www.yourdomainname/tngfoldername and the TNG page should appear. Complete any additional TNG instructions.When the TNG install is complete go to the admin home page, select setup and then the diagnostics tab.
Scroll down and check the status of each line.
If any lines show a yellow or red warning, check the warning information to determine the corrective action.
If you entered the permissions correctly you should not see any warnings.
At this point you can enter people manually or import a GEDCOM.
Keep in mind if you import a very large GEDCOM it may take a while.
My GEDCOM is 80.86GB and it takes about twenty minutes to import.
TNG has a progress bar which works great in version 11.0.2 on the Synology DSM unless you are using SSL.
If you have questions about your TNG software contact TNG or check the TNG WIKI pages for help and information.
If you have technical questions about your Synology DSM contact Synology Tech Support or check the Synology Forums for help and additional information.